Thursday, December 18, 2014

Yes She Has Makeup On... Why the Big Deal?

I love makeup and the amazing things that it can do for a woman's confidence, mood, and self-esteem! However, just like a quarter, there is always a flip side that I am loathe to talk about but I feel that it must be mentioned, discussed, and placed on the proverbial table. There are many ladies who where not blessed to have a semi decent decent ride on the adolescent train. For many of those ladies, they suffer from hyper-pigmentation, pock marks, and all types of skin ailments that are damaging to the skin. Makeup is most often the answer and help to cover up these embarrassing and/or bothersome skin conditions.

It's when the makeup comes off or the before and afters are shown that chaps my hide! You often hear or see comments like "take her swimming on the first date," "make up is the devil," "some girls need all the help they can get, glad I'm not one of them!" Of course we should all embrace our natural beauty but why the bashing toward women who need and utilize makeup in order to help boost their natural beauty and rid themselves of some of the effects that life has left on the faces? How dare some individuals be so bold and audacious as to not consider the feelings of these ladies? It is almost like telling someone who has no control over the size of their feet that you should have them try on shoes on your first date to make sure their feet are too big before getting too involved with them (see how stupid that sounds?)

I will jump off of my soapbox for now. I just ask that we be mindful that not everyone was blessed with the same flawless skin as you, nor will something as simple as changing your skincare regimen fix what for some is a serious issue of their self esteem.  

Wednesday, December 3, 2014

The Apology

I know that it has been a long, long, long while since I have made a post. So, my first post back will be a sincere apology to everyone that has been looking for post and that follow this blog. There are no excuses for my falling of the map the way I have but there have been many, many issues that I have had to deal with that has hindered my dedication to makeup and this blog. I am now back with more tips, tricks, and products! Please say that you forgive me! Are you ready for what I have in store?

Wednesday, September 24, 2014

Are You Up to the Challenge? *Giveaway*

Ladybugs,

I wanted to do something different this week as well as say thank you to those of you that keep up with this blog. This week I want you to go to Facebook (Onyx Radiance) and post your best, most fierce eye look for a chance to win a Glam It! Butterfly Pallette of your choice ($26.50 retail price!) Two winners will be selected on Wednesday, October 1st! Get your looks out there and show the world what FIERCE is made of!!! Go to www.glamitcosmetics.com to view more Butterfly Pallettes!

                           Cross My Heart

Thursday, September 18, 2014

How to Clean Your Makeup Brushes!

Hello beautiful!

I hope you are having an amazing week! Earlier this week I had a friend ask me about cleaning her makeup brushes. I know that in the hustle and bustle of life some of us may overlook the fact that cleaning your makeup brushes are just as vital and important as selecting the right foundation. Besides making sure that you aren't transferring bacteria from product to product or to your face, your brushes are an investment in your makeup repertoire! Think about it, good brushes aren't cheap! So why not make sure you take care of those things just as you would take care of your car or shoes?

Now there are several reasons for ensuring that your brushes stay clean! Regular brush cleaning ensures that you rid your brushes from old makeup, bacteria, dead skin, oils, dirt, and debris. Cleaning your brushes regularly also ensures that your brushes remain soft. Below is a nifty do it yourself brush cleaner pin I found on pinterest. Now if you prefer not to make your own cleaner, many cosmetic companies sell brush cleaners as well. So madam, if you haven't cleaned your brushes in a while... Hop to it!!! Don't forget to follow us on FB and Instagram for looks, tips, and tricks to get your through the week!

Thursday, September 11, 2014

Long and Luscious...False Lashes!

My darling, darling beauty,

falselashtutIf you are anything like me, you got the short end of the stick (lashes) while your little brothers received long, luscious, pretty, and downright irritating eyelashes! So, we (I'm including you so I feel better) have to compensate with false lashes. Now, I'm not talking about those lashes you see some women walking around with that looks like they are saying hi to you with feathers on their faces. I'm talking about beautiful, downright natural looking lashes. Now you may say, I have some or I'm going to purchase some but how do you put the little buggers on? I have found several golden nuggets on application and keeping them clean and looking like new. First realize that there are different types of lashes you could buy; full, individual, and self-adhesive. The first thing about selecting your lashes, it's a matter of preference. Do you like the funky, eclectic lashes or the nondescript ones? Then, what is your preference in application? Do you prefer the self-adhesives or the ones you need to apply lash glue to? If you don't know for sure on the application preference, try one pair of each; self-adhesive and glue application. Also keep in mind that lashes only in one size. Don't forget to trim them to fit your unique eye shape and size.

Before you look at the picture tutorial courtesy of Peach Milky Tea, make sure you have the following materials to apply your lashes: 1) tweezers, 2) eyelash glue/adhesive, 3) the lashes, 4) your liquid/ pencil eyeliner, 5) small scissors, and 6) mascara. Now don't forget to keep those babies clean! The next picture tutorial will make sure you keep those babies looking GREAT!

How to clean fake eyelashes.
Don't forget to follow us on FB or leave your questions and comments below. Now get to work!


Thursday, September 4, 2014

Have Skin Allergies or Break out into Rashes? YES!! You Can Still Wear Makeup!!!

Well beautiful one, 

I have been wracking my brain on what I should make this post about. (Hence why it's a day late.) So while I was brooding over what to write about, I remembered a conversation with a friend of mine who is in the same, if not worse allergic condition than myself. My poor friend is even allergic to her own hair. We both have a LOVE, PASSION for makeup and she inquired how I am able to wear makeup and not break out in hives and rashes (which has happened too many times to count.) My answer for her was to wear gluten free and mineral makeup!

Many people do not know that there are companies out there that produce not only mineral makeup but gluten free makeup as well. One company is Glam It! Cosmetics. (I LOVE this brand by the way!) Don't know if you have a gluten allergy or intolerance? According to MindBodyGreen.com there are ten signs that you have a gluten intolerance: 

1. Digestive issues such as gas, bloating, diarrhea and even constipation. I see the constipation particularly in children after eating gluten.
 
2. Keratosis Pilaris, (also known as ‘chicken skin’ on the back of your arms). This tends be as a result of a fatty acid deficiency and vitamin A deficiency secondary to fat-malabsorption caused by gluten damaging the gut.
 
3. Fatigue, brain fog or feeling tired after eating a meal that contains gluten.
 
4. Diagnosis of an autoimmune disease such as Hashimoto’s thyroiditis, Rheumatoid arthritis, Ulcerative colitis, Lupus, Psoriasis, Scleroderma or Multiple sclerosis.

5. Neurologic symptoms such as dizziness or feeling of being off balance.
 
6. Hormone imbalances such as PMS, PCOS or unexplained infertility.
 
7. Migraine headaches
 
8. Diagnosis of chronic fatigue or fibromyalgia. These diagnoses simply indicate your conventional doctor cannot pinpoint the cause of your fatigue or pain.
 
9. Inflammation, swelling or pain in your joints such as fingers, knees or hips.
 
10. Mood issues such as anxiety, depression, mood swings and ADD.

Even if you do not have any of these symptoms, there is still a large population of women who are allergic or have reactions to some of the chemicals that are used in makeup which is why the mineral makeup industry has taken off. Mineral makeup generally does not contain certain oils, waxes, fragrances, and preservatives that are used in many makeup formulas. 

The one reason that I am so in love with Glam It! Cosmetics' mineral and gluten free line is because they carry products for every makeup need, not just foundation! They have lipglosses, eyeshadows, lipsticks, and everything else you can imagine in gluten free and mineral! So for all of you beautiful ladies that would like to wear makeup and just don't know what to do... Go gluten free and mineral! 

Before you get to work, don't forget to like our FB page (Onyx Radiance) for looks, tips, and makeup hacks and on Instagram! Also, have a question for me or a topic you would like to see here on the blog? Leave me a message below! Now... you can get to work! :-)

Wednesday, August 27, 2014

Do You Know Your Skin Type?

My Onyx Beauty,

Please let me lay my head on your shoulder and lament about the week I have had! Wooo!!! Well, you know that no matter the hectic week, my mind is always on makeup! An avid reader of mine asked a great question of me that I actually hadn't thought of... How do I figure out my skin type? Ladies, I cannot stress enough how important knowing your skin type is to selecting your makeup, cleansers, and makeup removers! So lets get to it... Do you have your towels and cleansers ready?

First, wash your face. Be gentle and do not over wash your face. We want to clean our faces, not scrub away all of our skin!

After gently patting your face dry, do not apply any moisturizers, touch your face, or ANYTHING for next hour. This will give your face a chance to get back to it's "normal" after being cleansed. Trust me... allowing your face to get back to it's "normal" is vital to figuring out what your skin type is!

Did you wait an hour? A FULL hour and not 45 minutes? Ok! Next take some kleenex or tissue and dab your "T-zone" (your forehead and nose)

Now we get to the good part! What type of skin do you have?

If you have NORMAL skin , you should see neither oil nor flaking skin. If you have NORMAL skin I am rolling my eyes so hard at you right now... but I still love you! ;-)

If you have OILY skin, you will see a greasy buildup on the tissue. Many individuals like myself with oily skin often have large pores and are "shiny."

If you have dry skin, your skin may feel "tight" or show flakes of dead skin. Many individuals with this type of skin often have small pores. If this is you... moisturizer should be your middle name to ensure a supple, smooth appearance.

Then there are the many individuals that have combination skin. Combination skin often shows characteristics of all three skin types. Most often, the "T-Zone" is oily while the rest of your skin may feel dry to normal.

Now that you know the type of skin that you have, you can better select which products, cleansers, primers, etc will work best for your skin type! See that wasn't so hard now was it? Have questions or topics you would like me to touch on? Leave me a comment beautiful... In the mean time, get to work!


Monday, August 18, 2014

Pumped and Primed... What's the purpose of primer?

Why hey there beautiful!!

I hope that your week has started out as wonderful as I am sure you look as you are reading this! It was called to my attention by one my readers (thank you L.W.) asked me a question that I honestly didn't think to explain... What the heck is a primer and what does it do? You had that question too? Well I'm glad you asked!

There are different types of primer out there just as there are different kinds of foundation. Now don't get scared on me now, keep reading! The purpose of primer is to help your makeup last longer, fill in fine lines and wrinkles, control shine, and prevent creases in eyeshadow and foundation. Yes. primer does all of that! Now just like foundations, you need to look for a primer that is right for your needs and your skin tone. For me, my face produces more oil than what the Beverly Hillbillies found! Just because I like a primer for my face... you may not. Primers are made for pretty much every part of your face where you put makeup. Does your eyeshadow streak or fade during the day... just like apps, there's a primer for that. Wish your favorite shade of lipstick didn't fade so quickly? Well... there's a primer for that!

With any primer, you should wait a few minutes after application before applying your makeup. Essentially allowing it to dry and do what it's supposed to do. Face primer a very light gel consistency. Now I can admit that I didn't use primer for a long while because I didn't want to add another "product" on my face but recently I found one that I fell madly in love with. The one I use is so light I almost put too much on because I didn't feel anything on my skin. (It was great!) The picture below is the one I use (Glam It! Foundation Primer). So, if you are having any issues with your makeup fading, streaking, or settling into fine lines and/or wrinkles or just want your makeup to stay where you put it... Prime it baby!!!

Friday, August 15, 2014

Step-by-step: In what order do I put my makeup on?

Radiant love,

Over the past few days in my comings and goings, I have encountered several things. I have seen women looking like they sniffed too many markers then went Ronald McDonald on their face and/or women that look like they have permanent angry brows >:-/ It made me think that in writing my precious blogs that I didn't consider that some ladies who are new to makeup are absolutely clueless about applying anything I have talked about it the first place. So I searched from one end of the web to the other and found a neat graphic on "how to" put your makeup on.

By no means do you HAVE TO apply your makeup in this order. I was actually pleasantly surprised that I actually do put my makeup in this order although I was never educated, told, or trained to do so. I just did it because it made sense to me. Before you go through the chart, let me say this:

Perfect! Elaborate but detailed. Wont necessarily follow it but its nice to have :)There is no amount of makeup that will make you beautiful unless and until you BELIEVE you are beautiful and deserve to be called the beautiful rose that you are! Before you wash your face, add a primer, or even a dab of foundation, be confident in who you are as an intelligent, worthwhile, and amazing woman! Once you have that down, then take care of yourself. Not only should you take great care of your face, but take great care of your body! What you eat, consume, and do to your body manifest through your skin and how you feel. Want more radiant skin with less blemishes, make sure you are drinking your recommended amount of water daily. Concerned about wrinkles, use sunscreen, don't smoke, and always apply product to your face in circular, upward motions. No matter what advice or look tutorial I give on this blog, understand that your beauty starts with what you believe. You become what you believe... YOU ARE BEAUTIFUL!!!


Monday, August 11, 2014

Throwing Shade... Foundation!


It is a new week and it is a new opportunity to talk makeup!!! Oh makeup, how I love thee... Sorry, I was looking at my makeup collection and got side tracked :-) Anywho, when beginning to do makeup, it is important that you start with great foundation! Not only do you start with a great foundation but you want to pick a foundation that you are the most comfortable with and provides the coverage that you are looking for. Before we talk about foundation application, let's talk about the types of foundation.

1) Pressed Powder- this powder is shine-absorbing, usually oil free and works well with all skin types. It provides a natural matte finish. If you don't like to use this as a foundation, you can use this in combination with another type of foundation as a blotting powder.

2)Liquid Foundation- there are various types of liquid foundation. Often, liquid foundation offers light to medium coverage and may contain some level of SPF. Some liquid foundations are also formulated for different skin types; oily, dry, normal, etc.

3) Paramedical Kamaflage (offered by Glam It! Cosmetics)- This type of foundation is for scarring, freckles, bruises, burn scars, birthmarks, age spots, rosacea, and varicose veins. This heavy-duty kamaflage cream works to cover every skin flaw or is great for those who like heavy coverage.

4) Tinted Moisturizer- this is hydrating moisturizer that adds a touch of color to the skin. Depending on the brand, it can also offer SPF protection and can be used by all skin types.

5) Two-Way Foundation- These are foundations where the liquid and powder are combined into one product making application quicker.

Now beautiful one, please don't go to the nearest Sephora and pick the foundation that "looks" like it's the right one for you! You will come out with 1 of 2 outcomes, you will look ashy and freshly ready for the casket or you will look like you tanned your face only! The best practice to find the best foundation color for you is to try "swatching." First place a color on the back of your hand, see what blends in (as if you have no makeup on that area.) Once this has been accomplished, try that color and one shade lighter and darker on your jawline. With the colors on your jawline, walk into or look at the colors in natural light. The shade that "disappears" is the right foundation color for you! Keep in mind though that with the changing of the season, we have changes in our complexion. The shade you may use in the summer may be too dark for you in the winter, so plan accordingly.

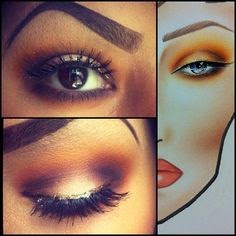
Below is a nifty little graphic I found on pinterest. This is all about application!!! Read through it and practice! I will have a concealer post up soon but for now... Get to work!
Learn these tips and tricks for selecting and using foundation.

Saturday, August 9, 2014

Drawing the line... Eyeliner!


Radiant beauty it has been a week!

Liquid Eyeliner IdeasPlease forgive my tardiness in getting this post up but when I say it has been a week!!! Woooo!! Enough about me and my hecticness, let's get down to makeup! Let's talk eyeliner! Eyeliner can add spice, intrigue, and sass to your look. Now before you go and try any of the liner looks below... PRACTICE!!!! I really don't want to hear stories on the 6 o'clock news about women poking their eyes out or walking around looking like crows pecked their eyes in a remake of the "Birds!"

There are several materials that one can use as an eyeliner. You can use a eyeliner pencil, liquid liner, gel liner, cream liner, or you can use eyeshadow. Knowing that there are so many types that can be used can be overwhelming so I will not go into all of the pros and cons of each. It is best to try them for yourself. Although I personally can't seem to get my lines looking flawless with a pencil to save my life, it is the easiest to start with. Once you get comfortable doing a basic outline of your lash line, then try the more complicated looks and try those looks with different types of liner.
eye liner
For the more advance, cream/gel liners are amazing! Cream liners make smudging easier and many cosmetic lines have colors that are simply out of this world! Using eyeshadow is wonderful as well but it does not last as long as gel, cream, liquid, or pencil. For applying cream or gel liner, it is best to use a flat liner brush. It will help make application smoother and easier! Remember beautiful, practice and you will have eyeliner down in no time! Now get to work!


Monday, August 4, 2014

Ohh La La... The Ombre Lip!

Well hello love!!

I don't know if you have been aware of this new trend but I am in love! The Ombre lip is simply using 2 (or more depending on the look you are trying to achieve) shades of lipstick or gloss along with lip pencils to achieve a gradient effect on your lips. When done properly,  this can give your look a classic, sheekness! First, I am going to post the "how" of doing this look. Later, I will post some photos of how to do this look with various colors. Can you see my excitement?!?!?

Friday, August 1, 2014

Throw Away Makeup? Whhaaaa?!?!?

Now we all know that in order to get that perfect look that you strive for whenever you put on makeup that you need to have a clean pallet (face.) What many of us don't think about, and I can definitely admit to this myself, is we don't consider keeping our makeup "clean." Many of us will keep our makeup for eons because... well... great makeup is not the cheapest thing in the world and who wants to throw away their favorite eyeshadow or foundation when they're not finished with it!!

Well after the research I've done, you just might want to rethink keeping the eyeshadow your mom brought you 6 years ago. Due to some of our basic human behaviors, simple oversight, and things done out of habit, our makeup can be a breeding ground for bacteria. This bacteria can have very harmful effects to our health and skin. For instance, do you reapply your lipstick or lipgloss after eating? Oh go ahead and admit it! Of course I, I mean you do! Well did you know that by reapplying your lipstick or lipgloss immediately after eating can leave deposits on the surface of your lipstick or in the tubes of your lipstick or gloss? Those food deposits breed bacteria... Disgusting right? To combat this, make sure you wipe your lips completely to ensure that food does not end up playing footsie in the tube! 

Now this next tip is why I advocate strongly that you have different brushes to accomplish the different steps of makeup application and cleaning those brushes regularly. Do you use the same brush to apply different products (use a foundation brush to apply foundation and blush)? Using this method which your brushes can end up redistributing the different oils in your skin to different products. Just think... do you really want your face to have natural look and your cheeks to look like your blush was made at the Crisco factory? I didn't think so! Below is a handy little list I found on how long you should keep every piece of makeup in your arsenal. So study hard ladies, make corrections, and enhance your beauty!


Monday, July 28, 2014

You Better Werk!!! Eyeshadow Application 101

Onyx beauty,

I know you have seen women walking around with their eyeshadow looking like they allowed their children to take crayons and draw on their faces. My sister I refuse to let you walk around looking like that!!! So here we have an eyeshadow tutorial! One thing I wish we as women would realize is that because you wear eyeshadow, it does not mean that you always have to go for bright, overly bold, and red carpet ready colors. You can take a very simple colors and go from job ready to out on the town with a simple flick of your brush! Before we get you there however, let's get to the basics. First determine your eye shape. Really read and understand the chart below. In understanding this, you will be able to apply your makeup in such a way that flatters your eyes, not cloud them or hide them. Later, I will post tutorials on various colors that work well with our deep dark skin as well as an eyeliner tutorial.

Feel free to post any questions that you have and I will try my best to answer them. I am in no way the repository of all makeup knowledge but if I don't know an answer, I will definitely seek out the advice of someone who does. Also, follow us on Facebook at Onyx Radiance for looks and tips not displayed here! Now get to work!

Thursday, July 24, 2014

Starting from the top: Brushes Part 2

Alright my Onyx dear.... 

Part 2 of the brushes is all packed into a neat little table I found on pinterest. Finding this table saved me a lot of time typing all of the uses and purposes of the various face brushes. As I said in the other post, there is no need to have every single brush in your makeup arsenal. Start slow and as you gain confidence in your abilities and find what looks are best for you, buy accordingly! Now get to work!

Face Brush Guide

Monday, July 21, 2014

Starting From the Top: The Brushes Part 1!

Alright Onyx beauties,

I was got so excited a few days ago getting together the perfect brow post that I neglected to start from the top... Not everyone is "makeup savvy" or have gone from "wearing no makeup at all" to "glamazon-diva-Beyonce'-is-going-to-hire-me-tomorrow-to-be-a-part-of-her-glam-squad." So, for you onyx divas that are makeup elites I apologize but we must start from the top and review makeup brushes! Before I begin typing away and getting to my happy place of makeup, unicorns, and rainbows let me make sure you know that in no way shape or fashion do you need to go out tomorrow and 1) buy any old brush kit you find and 2) you don't break the bank trying to buy every brush ever created and known to man. For anyone new to the makeup game, I always suggest starting small. Get one or two brushes at a time, learn and get to using them first, then expand your makeup brush collection. Will you definitely need every single brush listed in this post... NO! Some ladies that do MARVELOUS wonders on their faces do so with their fingers. Myself on the other hand... I use my fingers, not only will I look like BOZO the clown but I will also paint every surface in my house and my clothing some random color that is too noticeable to try to hide.

Now, before you learn which brush does what job... You need to know the types. There are synthetic hair and natural hair. Each have their pros and cons. I would suggest before making any purchase to feel each type to see which appeals more to you. My personal favorite brands to purchase are MAC (5 piece box set $49.50) and GlamIt! Cosmetics (5 piece box set $40.) I lean more toward GlamIt! because their brushes are very comparable to MAC and are cheaper. The list below is a description of what each brush does and what it is best used for. This post will only focus on the brushes used on the eye area. Part 2 will focus on the brushes used for the whole face.


Makeup Brushes

In 2 days I will post part 2 of "Starting for the Top: The Brushes Part 2"... Don't fret! You'll get the hang of this makeup thing in no time!

Saturday, July 19, 2014

The perfect brow!!!

I have noticed that everyone, whether they or not they have eyebrows or not, has been coloring in their eyebrows. Not everyone though does so without looking like they have Nike checks over their eyes... so what better way to make sure all of us Onyx beauties are looking like divas in the making than by making sure we aren't on Nowaygirl.com for looking crazy! Have you tried to give your eyebrows a fuller look? Well... love I have the tips for you!!!

1) With a brow pencil, underline the underside of your brow.

Keep in mind:

  • The underside of your brow should look the most precise, whereas the rest of the brow should look natural.
  • For the most natural brows, use powder rather than pencil to fill in.
  • Use a matte finish eyeshadow to fill in your brows with.
  • Always remember to Never use an eyebrow pencil to fill in your whole brows, unless you are going for the sharpie look. ( I know the picture shows the girl using a pencil to fill her brows in (pic 3) but that is the only pic I could find until I upload my own. Please bear with me.)
2) Now, start filling the brows with a powder.

Keep in Mind:

  •  LIGHTLY begin filling in the brow at the arch.
  • Continue outlining the very edge with light brush strokes (simulating hair)
  • Without adding any extra product to the brush, start filling the inside of the brow with the leftover residue on the brush.
  • Shade accordingly. Not the entire brow is going to be the same darkness. The arch and tail of the brow should be the most defined and the darkest. The inner should be sparse and light. 
3) With a spoolie, brush through the brows to blend the color together.

Keep in mind:

  • The spoolie bristles do a great job at picking up excess product and making the brows look more natural.
  • Clean the underside of the brow with a concealer one shade lighter than you skin tone. This will make the brows look more precise and clean.
  • For unruly brows, apply a clear brow gel or hair spray with a spoolie 
I hope this helps you as much as it helped me. Trying to follow some youtubers, I almost...ALMOST... looked like I had gorrilla eyebrows even though I get them waxed faithfully. Seriously, you just don't know how serious it almost got... I was this close (can you see my fingers?) to looking like a wookie!


Our makeup trends

As I was scrolling down my timeline on Facebook yesterday, I found a very interesting article that made me reflect on the coming evolution of our makeup trends. The "Dragging" down of the Black Woman's Image noted how many of the trends that African American women are following have many of us looking like drag queens or transgender women. Drag queens? Yes! Not to give too many details of the article away, the author primarily noted that many of the techniques created by transgender men and drag queens have many of us looking plain silly. (Don't lie and say you haven't seen some women and thought "Now she knows she looks like a pure clown with all that mess on her face" or just said a simple "Girl, bye!") I found myself surprised that I agreed with many of the arguments that the author of this article wrote. Before I keep you from reading any future blog post from me, let me first explain why...

Have you ever wondered why many of us feel the need to contour our faces for a more "feminine" look or to change our features when frankly, we already have what we are trying to create? If you have ever had your makeup professionally done, you may notice that may makeup artist do not do any contouring. Many makeup artist also do not add 15 + layers of makeup to your face either to get a beautiful natural look that makes you feel like royalty inside and out. So why do we do it when we apply our own makeup? Makeup should be used to enhance our beauty, not take us from looking like our mother's child to a stranger in 2.2 seconds! What do you think of our current makeup trends and where makeup seems to be going?

*This is not a blast against transgender women or drag queens... This is just a comparison in makeup application and styles between groups*

Thursday, July 17, 2014

Have you noticed?

I love makeup as much as the next woman, but whenever you look for makeup tips, tricks, or tutorials they are done by or for women that are of a lighter hue. As much as I applaud many of the women who get on Youtube and show the world their makeupless faces in order to teach us amateurs how to enhance the natural beauty that God has given us, I have yet to find an abundance of Youtubers or bloggers to follow that are any complexion darker than Taraji P. Henson.

We all know that if any of us of the darker hue tried any of the makeup tips or tricks suggested by women the same complexion as Beyonce', we would end up looking like we were "casket ready" (an ebony beauty friend of mine's term for her makeup experiences) in no time! So why not start the crusade to find tips, tricks, and cosmetics that look great on us women who are considered "deep dark" in the cosmetics world? Check into this blog weekly! I will be sharing what I know, what I find, great deals, and cosmetic brands that work well with us onyx beauties!